Datadog Mule Integration 4 APM
Datadog Integration
Introduction to Datadog Mule Integration 4 APM (DMI4APM)
Overview
The Datadog Mule Integration 4 APM (DMI4APM) enhances the monitoring capabilities of your Mule applications by seamlessly integrating with Datadog's APM system. Our solution extends the functionality of Datadog's APM connector by adding Mule-specific operations that encapsulate application flows. These operations not only capture and send trace data to Datadog APM but also facilitate the propagation of these traces across Mule applications and APIs.
Datadog APM Integration
Datadog's Application Performance Monitoring (APM) offers real-time insights into the performance of your applications, helping you track requests as they travel across different services and detect issues before they affect your customers. DMI4APM leverages this powerful feature to provide in-depth visibility into the health and performance of Mule applications.
Logs
DMI4APM ensures that all operational data is captured and logged, allowing for comprehensive traceability. The connector processes these traces, ensuring that the full journey of a request is visible in the Datadog APM interface, from the entry point in a Mule application to external services and back.
Mule Application Requirements
-
APM Mule Connector: Your Mule applications or APIs must have the APM Mule connector installed. This connector is vital for wrapping your application flows and enabling the propagation of trace data to the Datadog APM system. You can find it here.
-
Application Modifications: You will need to integrate Mule connector operations into your Mule applications or APIs. This step is essential for capturing the performance data that DMI4APM will process and send to Datadog.
Software Requirements
-
Java: Java 21 must be installed on your system, as DMI4APM requires it to run the necessary processes for APM data collection and integration.
-
Datadog Agent: A functioning Datadog Agent installation is required to facilitate the collection and forwarding of metrics and traces to the Datadog platform.
System and Network Requirements
-
Operating System: DMI4APM is compatible with both Linux and Windows operating systems, allowing you to choose the environment that best fits your infrastructure.
-
TCP Port: Ensure that TCP port 8127 is available and not being used by any other processes. DMI4APM uses this port to receive APM trace data, so it is crucial that this port is free to avoid any conflicts.
Important Notes
-
Verify that your system meets these requirements before proceeding with the installation.
-
Additional dependencies or configurations may be required depending on your specific system setup or the complexity of your Mule applications.
By meeting the above requirements, you can ensure that DMI4APM will function correctly within your Mule environment, providing you with comprehensive monitoring and improved performance insights.
System architecture
.png?VersionId=GXaqPHr.R1pU9AX7e.uYetpFEbLM84Hv)
Installation Guide for DMI4APM from the Datadog Marketplace
Before beginning the installation process for the Datadog Mule Integration 4 APM (DMI4APM), ensure that you have a Datadog account and that the Datadog Agent is installed and running on your system. The installation process outlined below is necessary to enable DMI4APM within your infrastructure, allowing you to start monitoring your Mule applications with Datadog's advanced APM capabilities.
Prerequisites
-
Datadog Account: Ensure you have an active Datadog account. If you do not have an account, you can sign up at the Datadog website.
-
Datadog Agent: The Datadog Agent must be installed and functioning on your system. For installation instructions, refer to the official Datadog Agent documentation.
-
System Compatibility: Verify that your system meets all the necessary requirements as described in the previous sections, including software, system, and network requirements.
-
Connected App: DMI4APM requires an Anypoint Platform connected app to validate there is an active Mule license. At the level of the Anypoint Platform master organization, create a connected app as "App acts on its own behalf - client credentials" and assign the "View Organization" permission.
Installation Steps
Once you have met all the prerequisites, follow these steps to install DMI4APM from the Datadog Marketplace:
Note: This steps must be executed as a standard user. Use root privileges only with specific sudo commands.
-
Open a Terminal or Command Prompt: Access your terminal or command prompt on the system where the Datadog Agent is installed.
-
Run the Installation Command: Enter and execute the following command to install the DMI4APM integration:
sudo -u dd-agent datadog-agent integration install --third-party datadog-iocs-dmi4apm==X.Y.Z
This command installs the DMI4APM version X.Y.Z as a third-party integration within your Datadog Agent environment.
Next Steps
After successfully installing DMI4APM, proceed with the configuration guide to set up and customize DMI4APM according to your monitoring needs. This includes setting up initial configuration settings, instances, and key configuration elements as detailed in the previous sections.
By following these steps and ensuring your system meets all requirements, you can leverage DMI4APM for comprehensive monitoring and improved performance insights within your Mule environment.
Configuration Guide for Datadog Mule Integration 4 APM (DMI4APM)
DMI4APM requires specific configuration settings to ensure successful integration with the Datadog platform and the Mule applications. Below is a guide to help you configure DMI4APM with the initial settings necessary for the Datadog integration.
Configuration Settings
Begin by setting the initial configuration for your integration with Datadog. This involves specifying the client_id and client_secret provided by Mule, as well as the dd_api_key, which is your unique Datadog API key.
These configuration settings will be provided in the conf.yaml file, which can be found in at /etc/datadog-agent/conf.d/iocs_dmi4apm.d/
# Initial configuration settings for the Datadog integration
init_config:
client_id: "<YOUR_MULE_CLIENT_ID>"
client_secret: "<YOUR_MULE_CLIENT_SECRET>"
dd_api_key: "<YOUR_DATADOG_API_KEY>"
Replace <YOUR_MULE_CLIENT_ID>, <YOUR_MULE_CLIENT_SECRET>, and <YOUR_DATADOG_API_KEY> with the credentials provided to you by Mule and Datadog.
Next, configure the instances and set the parameters for collection intervals, buffer sizes, tracer ports, and server ports. Here is an example configuration:
instances:
- min_collection_interval: 15
tracer:
source:
port: 8127
destination:
port: 8126
vm_options:
- "-Xmx128m"
Key Configuration Elements
-
min_collection_interval: The minimum interval between data collections, in seconds.
-
tracer:
-
source.port: The port where DMI4APM listens for incoming trace data (8127 by default).
-
destination.port: The port to which DMI4APM forwards the trace data (8126 by default).
-
vm_options: JVM options for running DMI4APM, such as memory limits.
Applying the Configuration
To apply these settings, insert them into the appropriate configuration file for DMI4APM, typically named conf.yaml or similar this has to be save in the following folder.
Linux:
/etc/datadog-agent/conf.d/iocs_dmi4apm.d
Windows:
C:\ProgramData\Datadog\conf.d\iocs_dmi4apm.d
After updating the configuration file with your specific values, restart DMI4APM to apply the changes.
Important Notes
-
Always keep your client_id, client_secret, and dd_api_key secure and do not share them publicly.
-
Adjust the buffer size and time limit settings based on the volume of your trace data and network conditions.
-
The VM options should be set according to the available system resources and the needs of your application.
By following this guide and correctly applying the configuration settings, you will establish a robust connection between your Mule applications and Datadog's monitoring services.
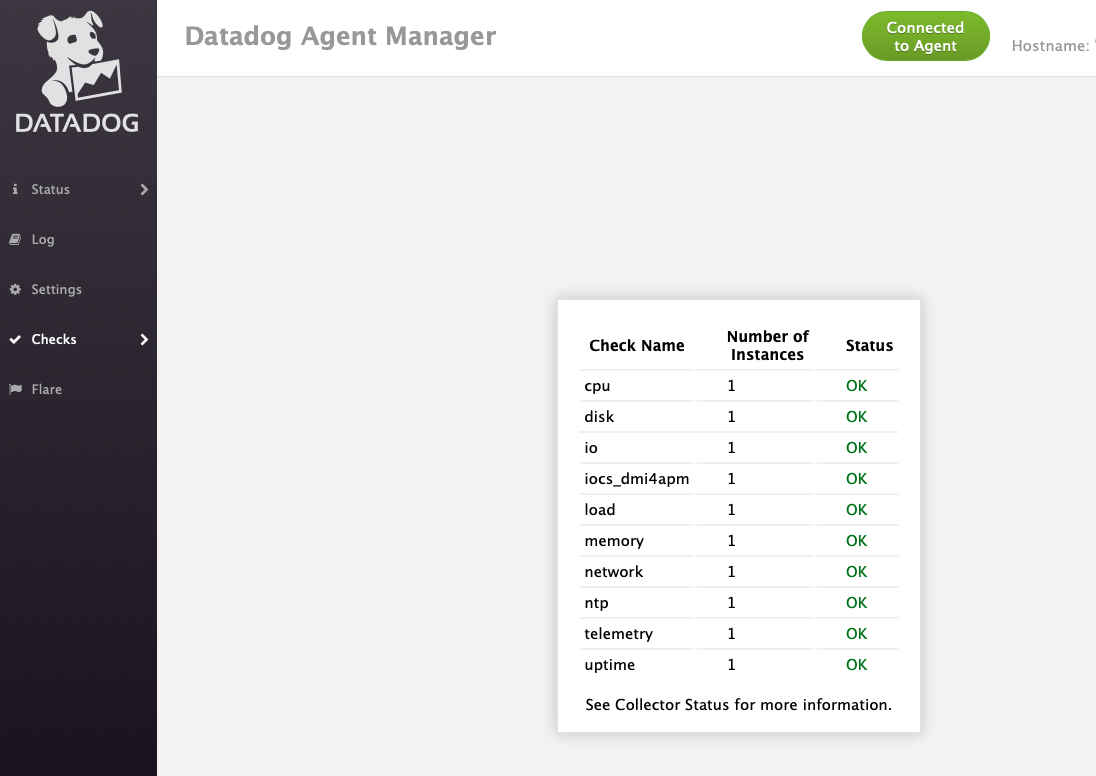
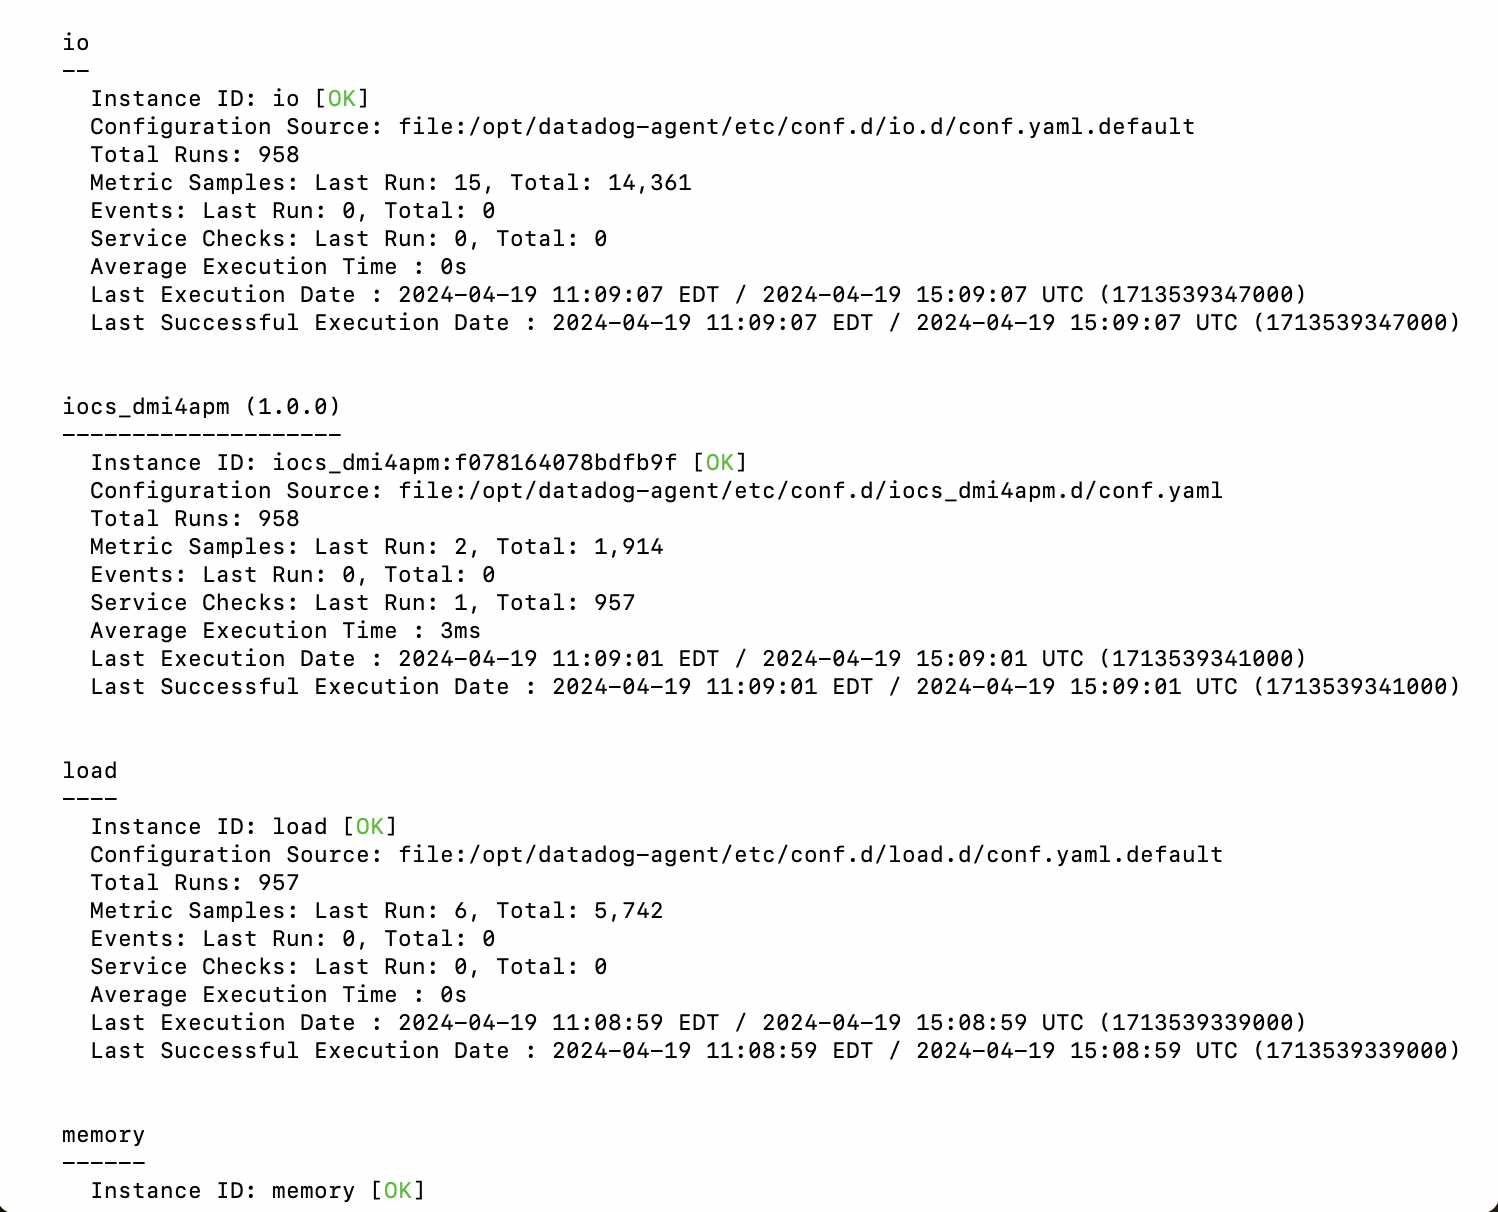
Verification: After the installation completes, verify that DMI4APM has been installed successfully by checking the Datadog Agent's status. You can do this by running:
sudo -u dd-agent datadog-agent status
Look for datadog-iocs-dmi4apm in the list of installed integrations to confirm that the installation was successful.
To confirm if the DMI4APM integration is running, follow these steps:
-
Navigate to the log directory by using the following path: /var/log/datadog
-
Display the content of the
apm.logfile. -
Check the log output for the following message to verify that the integration is running:
